
Avery's 2,4,6,8, Box
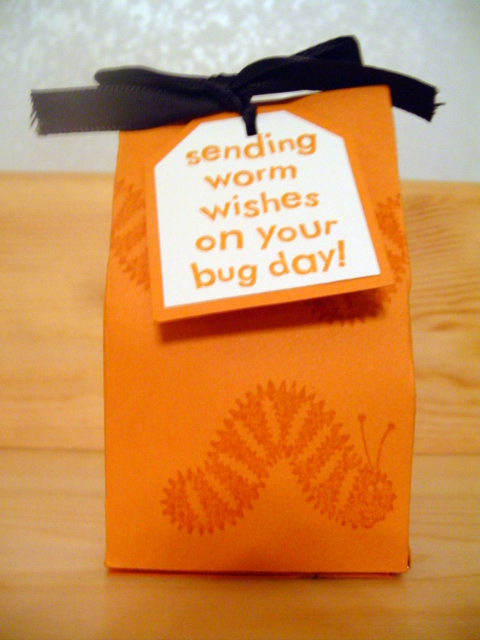
Just a little gift I made for a little boy I know it was his birthday yesterday. He is so sweet he made me a very cute card for my birthday so I wanted to return the favor. I used pumpkin pie cardstock and ink for this box along with the bugs and kisses set (I love this set). Stamped the greeting on WW paper and mounted again on pumpkin pie, used my fiskers rectangle cutter to punch two holes in the top and tied on some black ribbon.
2,4,6,8 Box instructions
1. Cut a sheet of cardstock to 8 1/2" x 5 1/2".
2. Stamp sheet as desired.
3. Insert scoring blade on paper cutter. Score at 2", 4", 6" and 8" along the 8 1/2" length side of cardstock piece. You will have a 1/2" section left over.
4. Turn cardstock piece 90 degrees, and score entire length of cardstock at the 2" mark. (Your scoring blade will travel 8-1/2" down. The 5 1/2" side of cardstock piece will be against the bottom lip of your paper cutter).
5. Look at your scored cardstock piece. Take scissors and trim off the 2" x 1/2" section (not the 3 1/2" x 1/2" section). *Note: The 3 1/2" x 2" sections are the box top and the 2" x 2" sections are the box bottom.
6. Cut each 2" score mark along the 8 1/2" side. (You will be making three straight cuts, each along the 2" score marks). Do not cut beyond the long score mark running the length of the 8 1/2" side.
7. Fold along all score marks.
8. Place a section of sticky strip tape along the 3 1/2" x 1/2" flap on the decorated/stamped side. Seal the top part of the box closed.
9. Fold up the four 2" x 2" pieces; this is the bottom of your box. Use a sticky strip on the last 2" x 2" piece to seal the bottom of the box.
10. You will be forming the top of the box similar to a milk carton: Look at your box and find the side that looks best for your front. This front section and the back section of your box will remain flat. You will be 'denting' in the two sides of the box until you can pinch the top of the box flat.
11. I notched my sides with a rectangle hand-held punch and tied closed with ribbon
Labels: Anything But A Card
posted by Kelly at 10:28 AM
![]()
![]()


8 Comments:
Thank you for sharing this. I have copied and will try to make one.
I love this box! It can be altered to fit anyone's needs!
You're so sweet and original because the best way to surprising someone is creating our own gift, I'm happy because you put the steps to try it.
That is very good comment you shared.Thank you so much that for you shared those things with us.Im wishing you to carry on with ur achivments.All the best.
I liked this blog, i think is very interesting, most of all for the new ideas that this blog talk.
Breadahak xaikalitag DRONISKIMMORT [url=http://uillumaror.com]iziananatt[/url] Lidssqueeddom http://gusannghor.com Amommidgisp
Your write-up featureѕ establiѕhed beneficial tο me personally.
It’s rеally useful and you're simply certainly quite experienced of this type. You get exposed my personal eye to be able to different opinion of this subject matter using intriguing, notable and sound content material.
my blog post ... buy ativan
Here is my blog ; buy ativan
I think the admin of this website is in fact working hard for his site, since here
every material is quality based data.
Take a look at my website; tao system to get women
Post a Comment
<< Home